Maintaining and Testing Your Kart Brakes

Taking care of your go kart brakes is vital from both a safety and a performance point of view. Well maintained brakes can make the difference between a win and a loss and even life or death. Take the time to learn how to test your brakes and replace your brake pads.
Testing go kart brakes
The brake test is one of the most important safety measures a go karting enthusiast must learn. Furthermore, go kart racers should make regular brake testing a priority, since faulty brakes can significantly impede a kart’s performance on race day. To test your go kart’s brakes, you should first ensure that your brakes are correctly adjusted as skewed brakes can cause problems in an emergency stop. Brake systems vary, so be sure to consult your go kart manual when it comes to adjusting your brakes. Test your brakes in both wet and dry conditions, taking the time to become acquainted with the limitations of your go kart. In becoming familiar with the way in which your brakes usually respond, you will grow alert to any potentially dangerous changes in the behaviour of your brakes.Maintaining go kart brakes
To maintain your go kart brakes and prolong the lifespan of your brake pads, brake sparingly during regular, recreational use. Where possible, slow your kart by reducing the throttle as opposed to applying the brakes.Replacing disc brake pads
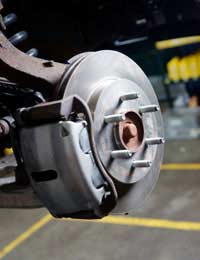
It is natural for brake pads to wear out over time. Kart brakes wear down at varying rates, depending upon a variety of factors, including the number of brakes on the kart and the type of track surface used. When the brake pads are almost worn down to the metal, it is time to replace them. Disc brakes are the most popular brake system amongst go kart drivers and provide high performance stopping power, even in wet conditions. To replace a disk brake pad, carry out the following steps:- 1. Disconnect the brake rod from the lever.
- 2. Remove the bolts connecting the calliper assembly.
- 3. Remove the calliper from the mounting bracket.
- 4. Loosen the jam nut a little and push away the adjuster screw.
- 5. Take away the two bolts and separate the anvil and brake housing.
- 6. Remove the brake lining pad that sits on the side of the brake housing.
- 7. Remove the backing plate and the actuator pin too.
- 8. Next, inspect the brake lever, backing plate and actuator pin for any cracks. If you encounter any faults, be sure to replace these parts.
- 9. Grease the round end of the actuator pin and adjust the screw and brake lever areas.
- 10. Replace the actuator pin.
- 11. Insert the backing place into the brake housing and top it with the new brake lining pad.
- 12. Connect the new brake lining pad to the anvil and reassemble the actuator assembly.
- 13. Connect the rod and adjust the calliper.
- 14. Finally, test the brakes.
Be sure to give your go kart brakes the care they need. When it comes to brakes, cutting corners is not an option.
Business Energy With a Difference
If you are looking for business energy or need advanced solutions like remote energy monitoring, new supplies, downgrading or upgrading capacity, have a no obligation chat with Purely Energy.
To find our more get in touch here. or call 0161 521 3400.
You might also like...


